

 Saburo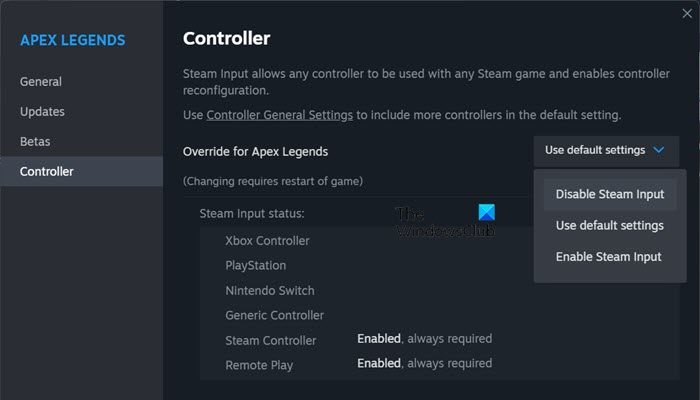
Steam Input is a game-changer for customizing your Steam Deck experience. With the right mods, you can remap buttons, add macros, and fine-tune controls to make your favorite games more enjoyable. Let’s dive into how you can install and configure these mods.
Understanding Steam Input
Before we get started, it’s important to know what Steam Input can do. Steam Input is a powerful tool that allows users to remap and customize their controller inputs, including support for various mods. This means you can tailor your control scheme to your liking, making your gaming experience more personalized and intuitive.
Choosing the Right Steam Input Mods
Popular Steam Input mods can significantly enhance gameplay by adding features like custom button mappings, macro commands, and more. For example, games like Dark Souls, The Witcher 3, and other action RPGs benefit greatly from custom input mappings, making them more accessible and enjoyable on the Steam Deck.
Installing Steam Input Mods
Step 1: Download the Mod
First, find and download the mod you want to use. You can usually find these on community-driven platforms like Steam Workshop or Reddit. Make sure to check the compatibility and read the installation instructions carefully.
Step 2: Enable Developer Mode
To install the mod, you need to enable Developer Mode on your Steam Deck. Go to Settings > System > Developer, and toggle the Developer Mode switch. This will give you access to the necessary tools to install and manage mods.
Step 3: Transfer the Mod to Your Steam Deck
Use a USB drive or an SSH connection to transfer the mod files to your Steam Deck. If you’re using a USB drive, simply copy the files to the drive and plug it into your Steam Deck. If you prefer an SSH connection, you’ll need to set up a network connection and use a tool like WinSCP to transfer the files.
Step 4: Install the Mod
Navigate to the directory where you transferred the mod files and follow the installation instructions provided with the mod. This usually involves running a script or placing the files in specific directories.
Configuring Steam Input Mods
Step 1: Open Steam Input Settings
Once the mod is installed, open the Steam Input settings by going to Steam > Settings > Controller. Here, you can see all the controller layouts and mappings available for your games.
Step 2: Select the Modded Layout
Choose the modded layout you just installed from the list. If you don’t see it, make sure the mod is properly installed and the files are in the correct directories.
Step 3: Customize Your Mappings
Now comes the fun part: customizing your button mappings and macros. You can remap buttons, add new commands, and even create complex sequences. Take your time to experiment and find the setup that works best for you.
Testing and Tweaking
After configuring your mod, it’s essential to test it thoroughly. Launch the game and see how the new mappings feel. If something isn’t quite right, go back to the Steam Input settings and make adjustments. It might take a few iterations to get everything perfect, but the end result is worth it.
Best Practices and Tips
- Backup Your Settings: Before making any changes, always backup your current settings. This way, you can easily revert if something goes wrong.
- Read the Documentation: Each mod comes with its own documentation and instructions. Read them carefully to ensure a smooth installation and configuration.
- Join the Community: If you run into issues or have questions, don’t hesitate to reach out to the modding community. Platforms like Reddit and Steam forums are great places to get help and share your experiences.
Common Issues and Troubleshooting
If you encounter problems, here are some common solutions:
- Mod Not Showing Up: Make sure the mod is properly installed and the files are in the correct directories. Check the mod’s documentation for specific file locations.
- Controller Not Responding: Try restarting your Steam Deck and the game. If the issue persists, check the controller settings and make sure the modded layout is selected.
- Game Crashes: Some mods may not be fully compatible with certain games. Try disabling the mod or updating to the latest version. If the problem continues, consider uninstalling the mod and reverting to the default settings.
Wrapping Up
Installing and configuring Steam Input mods can significantly enhance your gaming experience on the Steam Deck. With the right mods and a bit of customization, you can make your favorite games more enjoyable and accessible. So, go ahead and give it a try: you might just discover a whole new level of gameplay. If you’re looking to uninstall and revert mods safely, check out our step-by-step guide for more information.
FAQ
Can I use Steam Input mods with any game?
While most games support Steam Input, some may not be fully compatible with all mods. Always check the mod’s documentation and compatibility before installing.
What should I do if the mod doesn’t work?
First, ensure the mod is properly installed and the files are in the correct directories. If the issue persists, try restarting your Steam Deck and the game. If it still doesn’t work, consider reaching out to the modding community for help.